Azure Active Directory Identity Provider Setup
This document describes the steps to configure Azure Active Directory as an Identity Provider to integrate with Cyderes. Cyderes will act as the SAML Service Provider or "SAML SP". Cyderes supports SAML 2.0.
Configuring SSO
Adding an unlisted application
- Sign in to the Azure portal using a Azure Active Directory administrator account
- Browse to Azure Active Directory > Enterprise Applications
- Click New application and then Create your own application
- Select Integrate any other application you don't find in the gallery (Non-gallery) and provide a name in the Input Name text field
- Click the Create button
SAML-based single sign-on
Enter basic SAML configuration
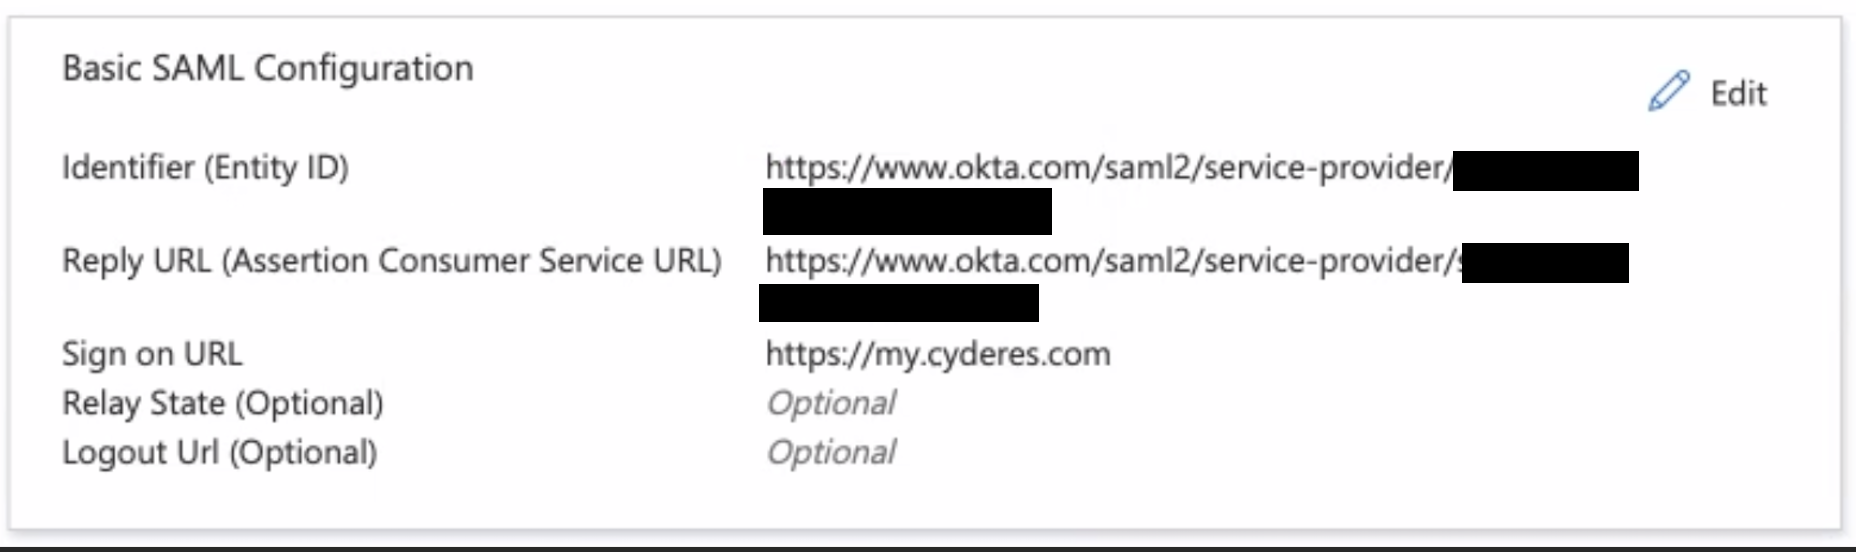
To set up Azure AD, enter the basic SAML configuration. Browse to Azure Active Directory > Enterprise Applications > Your application name > Single sign-on. The values can be added here or a metadata XML file may be uploaded to extract the value of the fields. These values are provided by Cyderes.
- Identifier - The identifier should be unique to the application for which single sign-on is being configured. This value can be found as the Issuer element in the AuthRequest (SAML request) sent by the application. This value also appears as the Entity ID in any SAML metadata provided by the application.
- Reply URL - The reply URL is the location the application expects to receive the SAML token. This is also referred to as the Assertion Consumer Service (ACS) URL. This information can be found in the SAML information provided by Cyderes in the md:AssertionConsumerService field.
- Sign On URL - Add "https://my.cyderes.com" to the Sign On URL field to redirect to our Client Portal.
Review or customize the claims issued in the SAML token
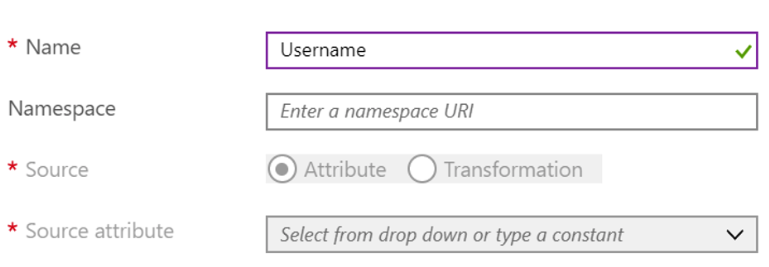
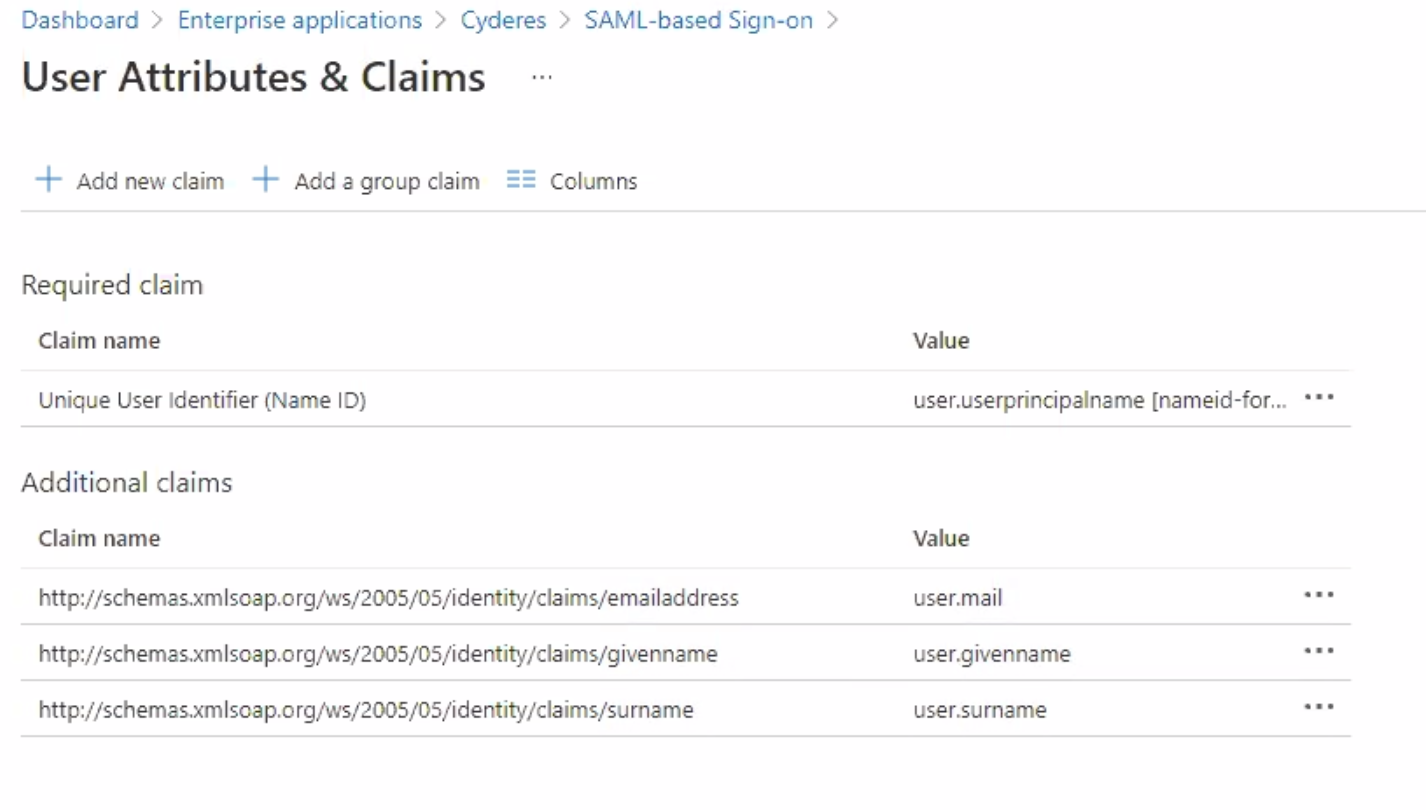
When the user authenticates to the application, Azure AD will issue a SAML token to the app that contains information (or claims) about the user that uniquely identifies them. By default this includes the user's username, email address, first name, and last name. Cyderes requires adding the following custom claims to the User Attributes & Claims configuration:
| Name | Namespace URI (Schema) | Source attribute |
|---|---|---|
emailaddress |
http://schemas.xmlsoap.org/ws/2005/05/identity/claims/ |
user.mail |
givenname |
http://schemas.xmlsoap.org/ws/2005/05/identity/claims/ |
user.givenname |
surname |
http://schemas.xmlsoap.org/ws/2005/05/identity/claims/ |
user.surname |
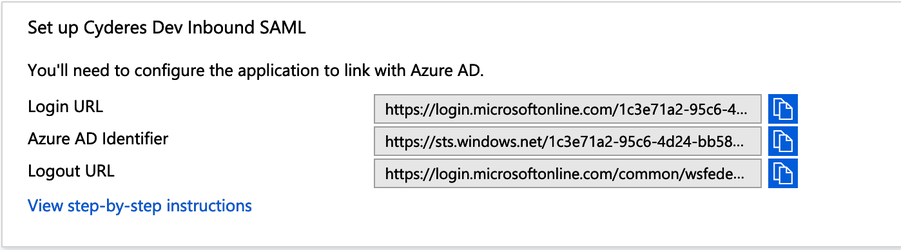
Set up target application
The SAML-based sign on page will provide the IdP values. Record these values to provide to Cyderes.
Assign users and groups to SAML application
Once an application has been configured to user Azure AD as a SAML-based identity provider, assign users and/or groups to the application. Azure AD will not issue a token allowing a user to sign into the application unless Azure AD has granted access to the user. Users may be granted access directly, or through a group membership.
To assign a user or group to the application, click the Assign Users button. Select the user or group to assign, and then select the Assign button.
Test the SAML application
Before testing the SAML application, Cyderes must be provided the necessary IdP metadata to complete configuration and assigned users or groups to the application. To test the SAML application, see How to debug SAML-based single sign-on to applications in Azure Active Directory.
Gather Information
Provide the Login URL, Azure AD Identifier, and Logout URL along with the Federation Metadata XML file generated by the Download link to Cyderes in order to complete configuration of Azure AD SAML as a SAML IdP.
