OneLogin Identity Provider Setup
This document describes the steps to configure OneLogin as an Identity Provider to integrate with Cyderes. Cyderes will act as the SAML Service Provider or "SAML SP".
Configuring SSO
Adding a New Application
- Login to the OneLogin admin console.
- At the top of the page, select Applications.
- Select Add App to add a new application.
-
At the top, search for "SAML Test Connector (IdP w/ attr w/ sign response)". Select that application.

-
Set the display name as "Cyderes Chronicle" and select Save at the top right.
- Select Configuration on the left side of the page.
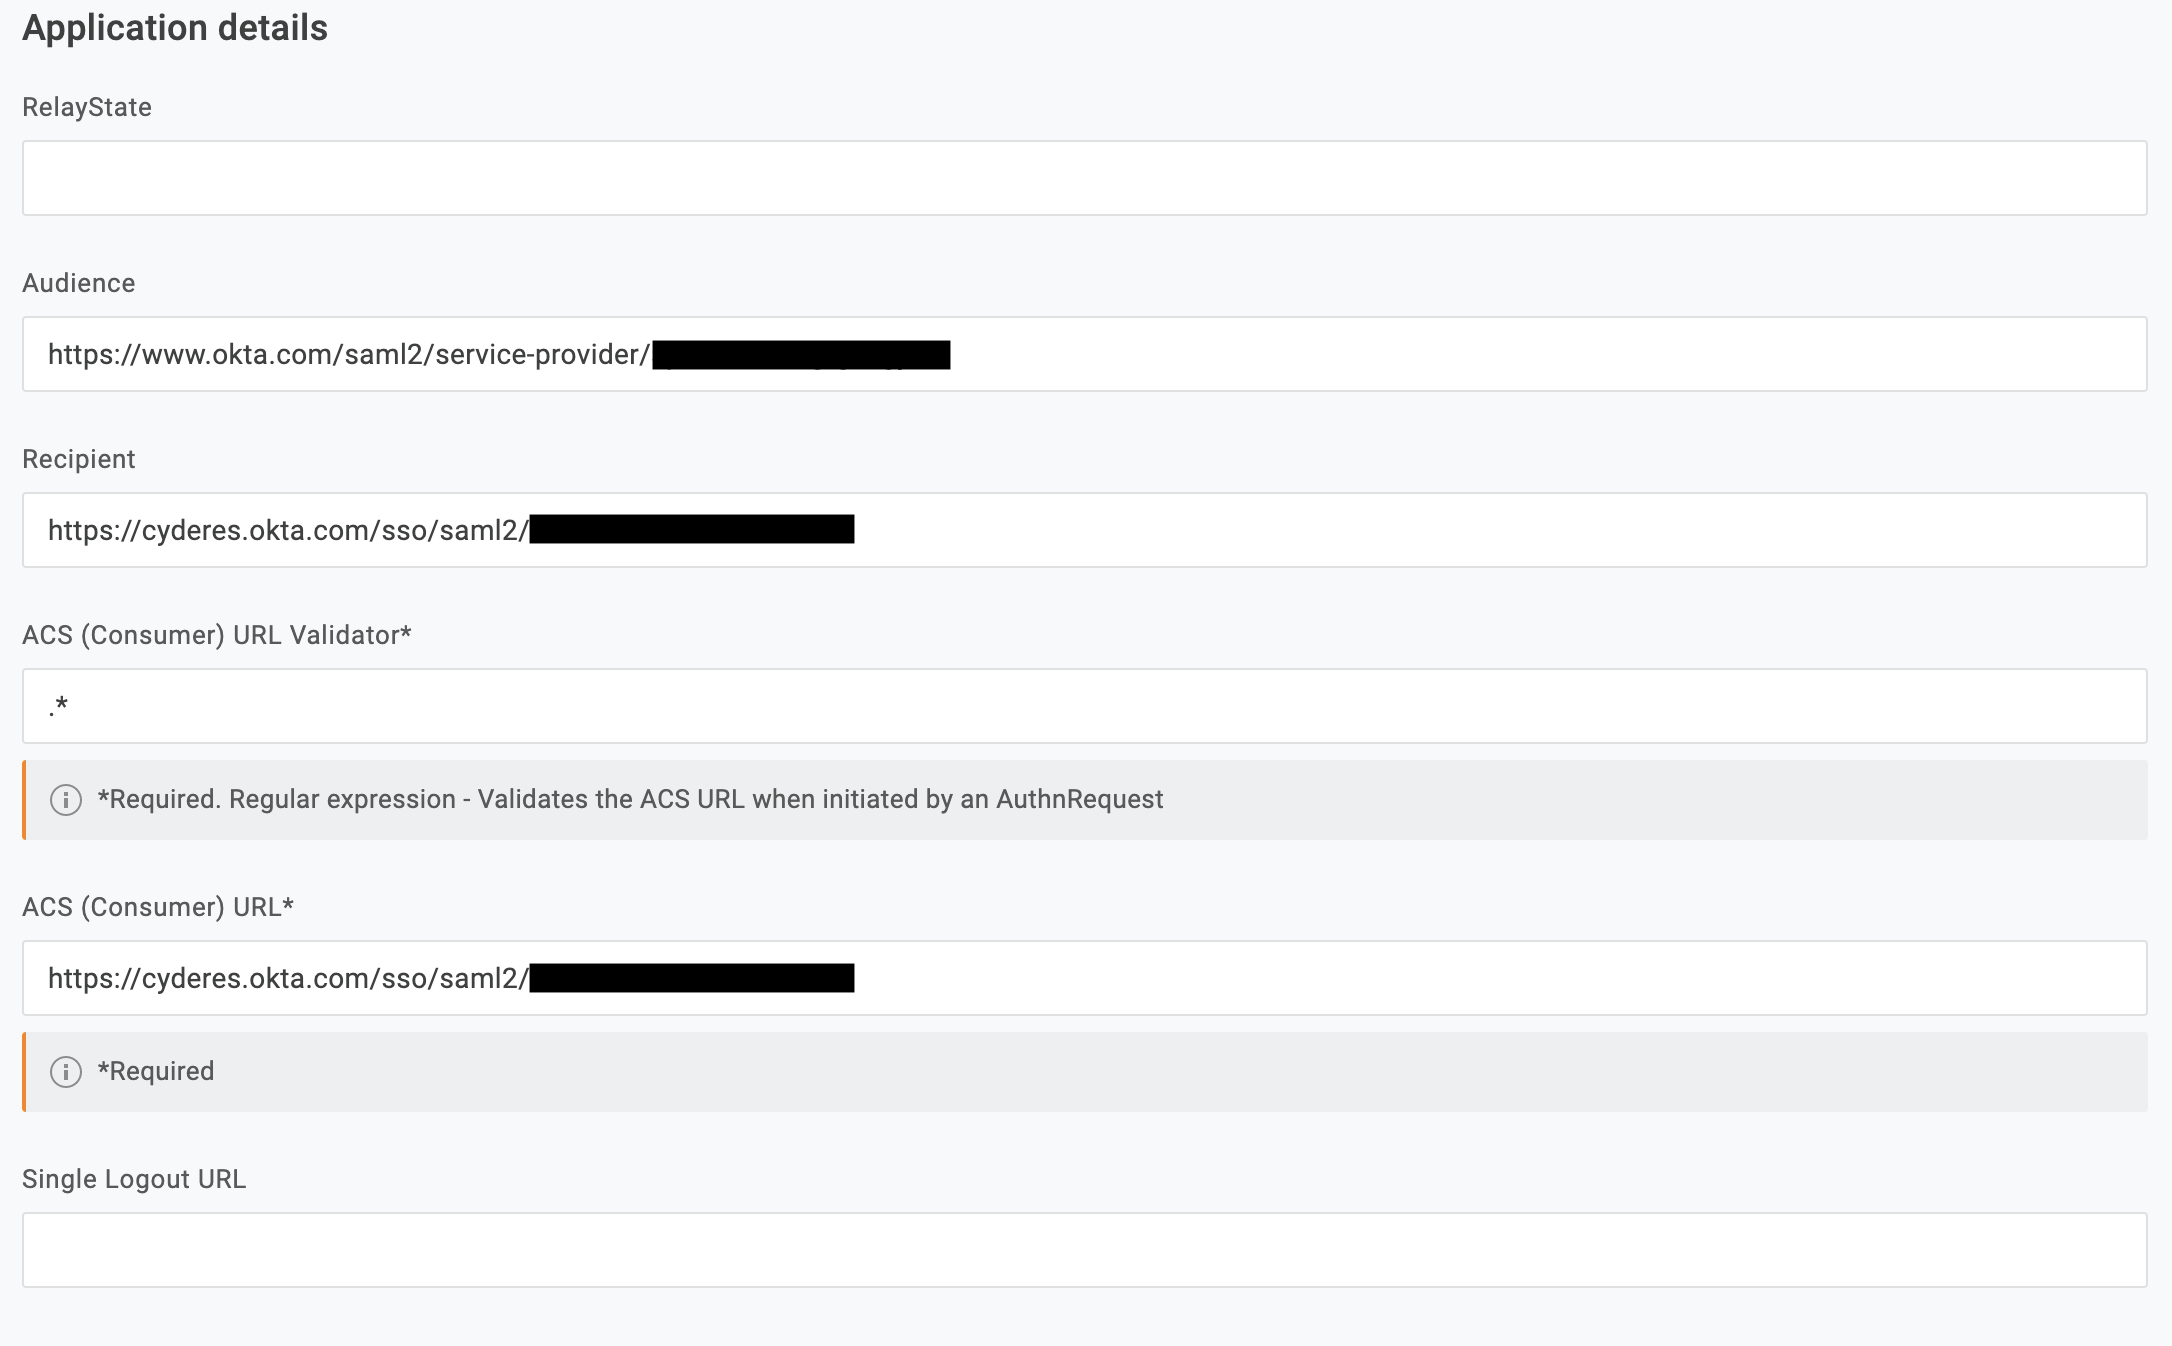
- Set the "Audience" field as the value of the "md:EntityDescriptor" field in the SAML metadata provided by Cyderes.
- Set the "Recipient" and "ACS (Consumer) URL" fields as the "md:AssertionConsumerService" value from the SAML metadata provided by Cyderes.
-
Set the "ACS (Consumer) URL Validator" field as
.*Example:
-
Select Parameters on the left side of the page.
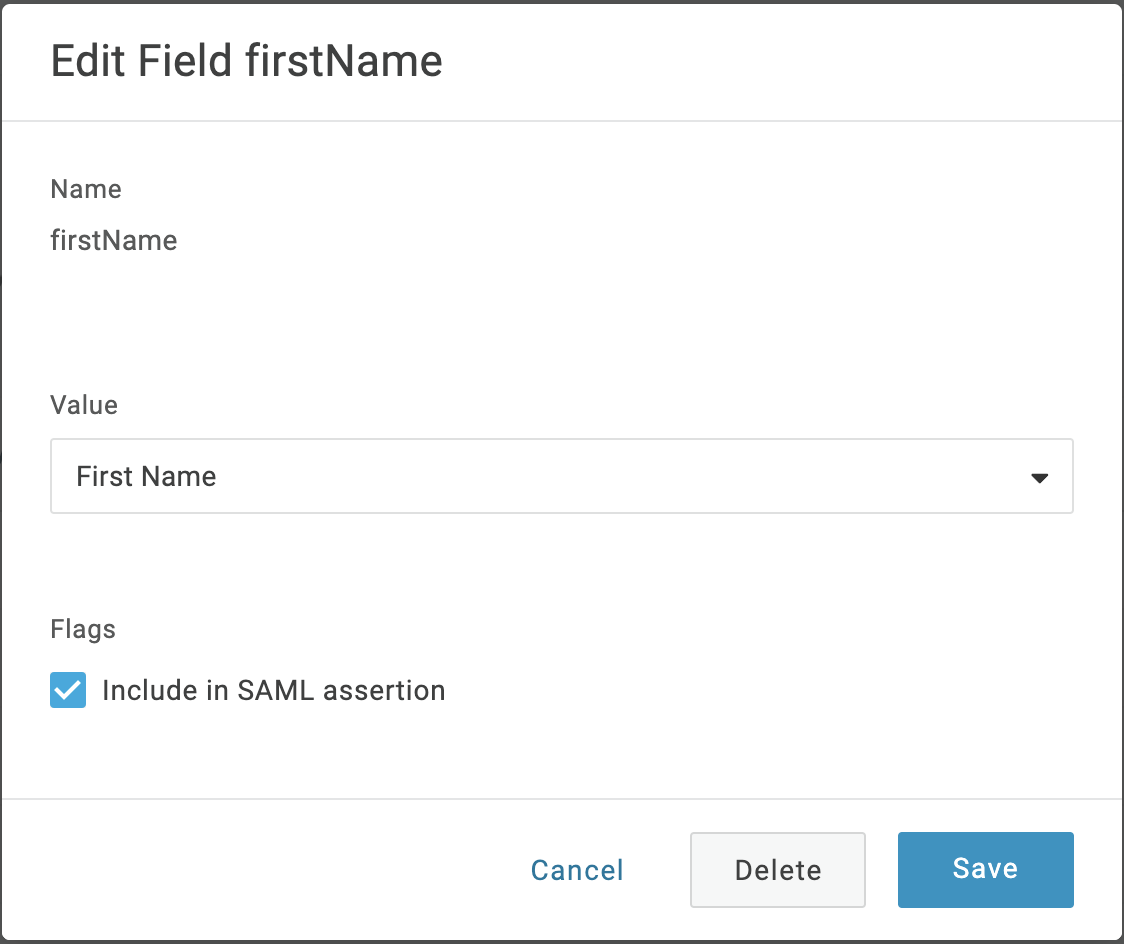
- Select the
+icon on the right side of the page to add a new attribute/parameter. -
Name the field "firstName" and select the checkbox for "Include in SAML assertion". Select "Save". Select the value of "First Name" from the drop down box. Select "Save".
-
Repeat Step 12 for the following values:
Parameter Value firstName First Name lastName Last Name userName Email 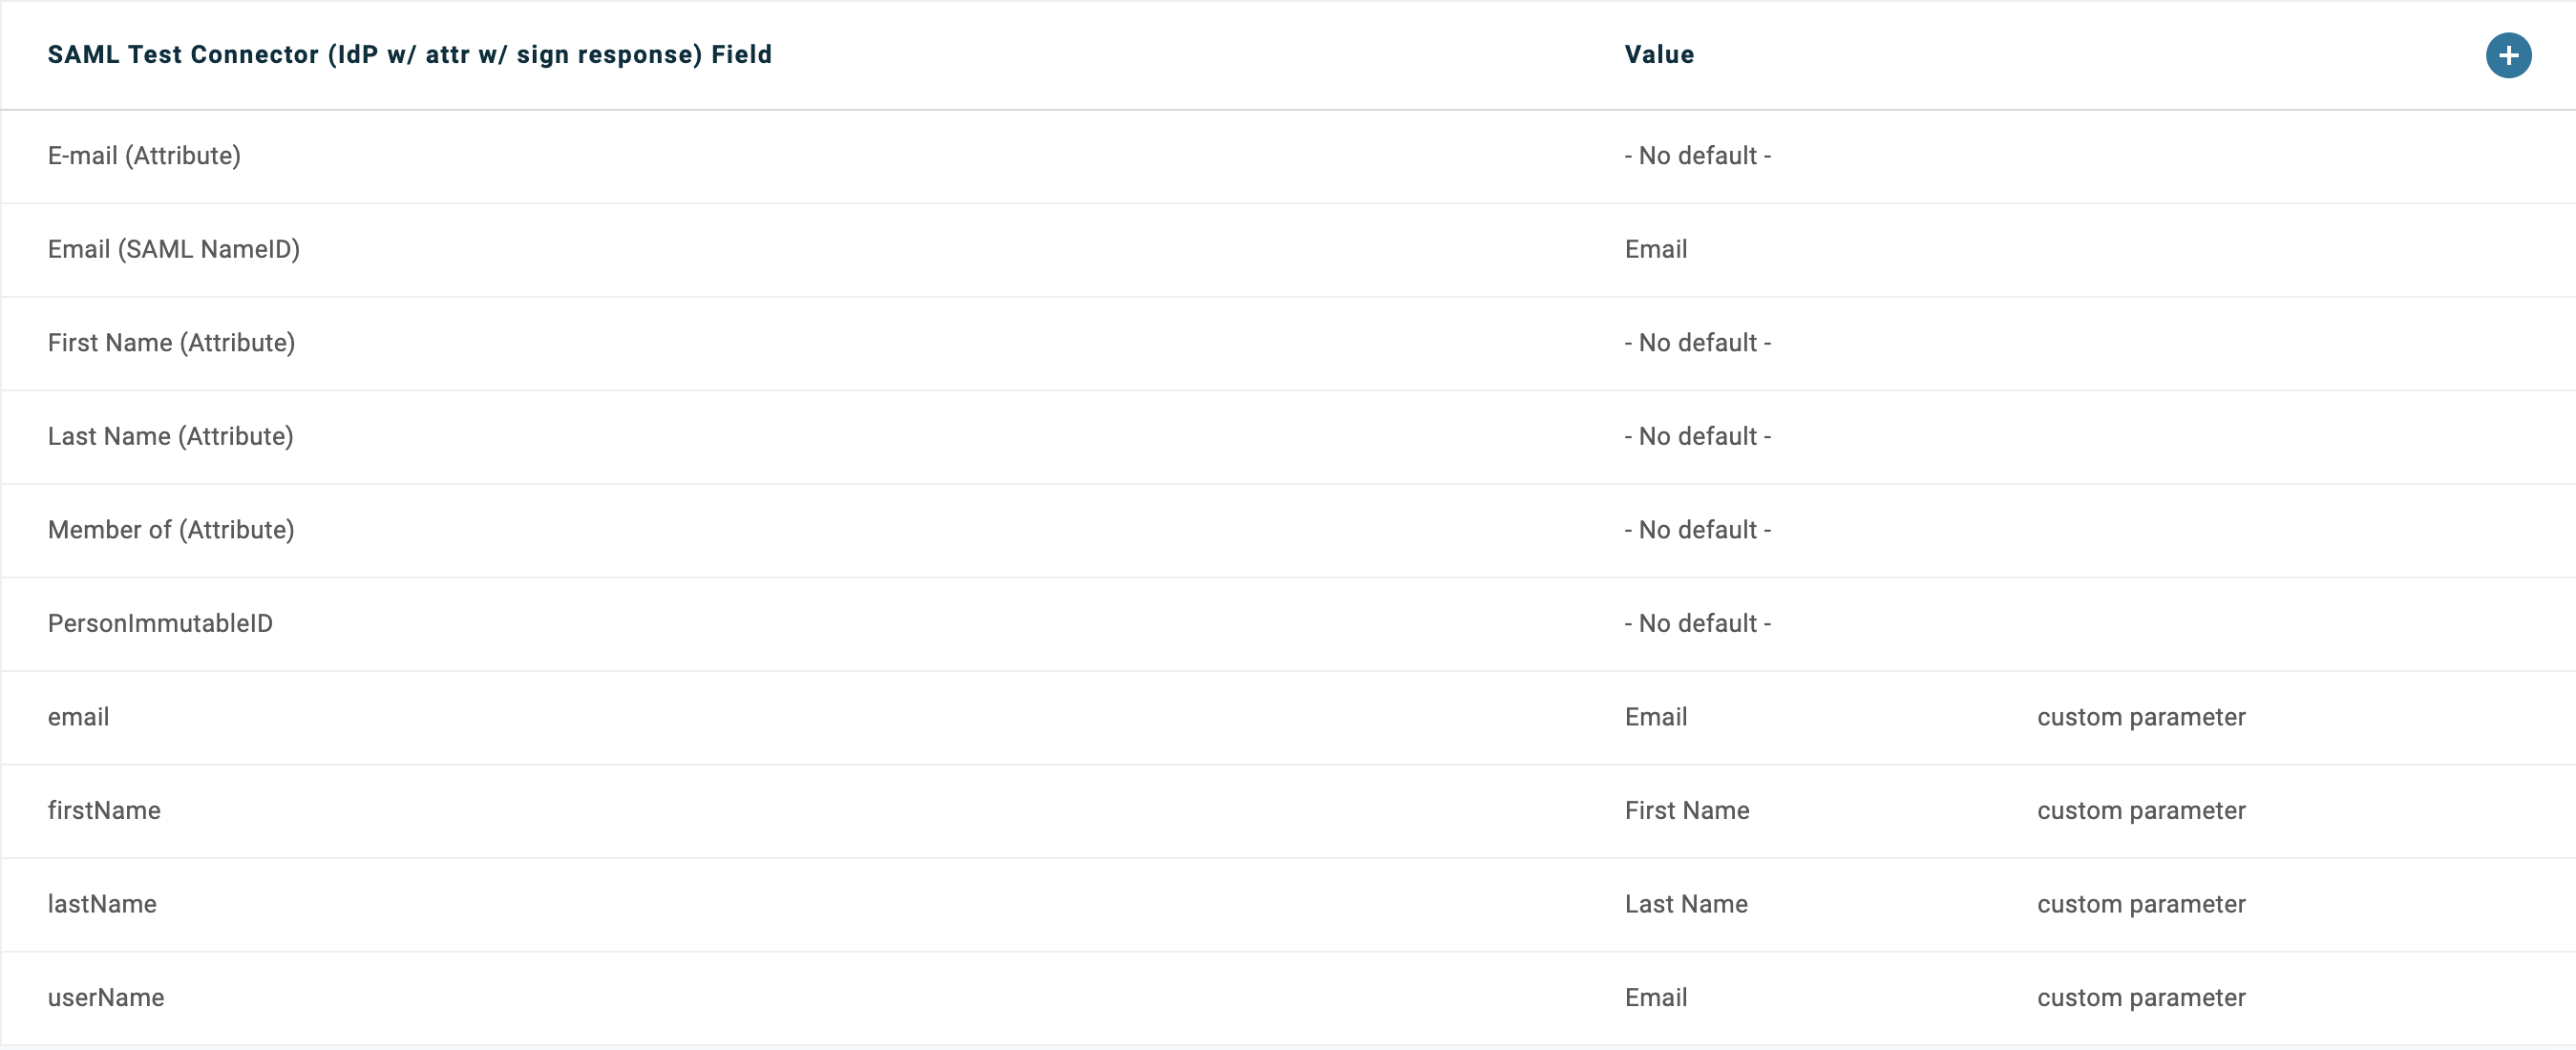
-
Select Save at the top right.
- Select "SSO" on the left side of the page.
- In the "SAML Signature Algorithm" drop down, select SHA-256.
- Select Save at the top right.
- Select the "More Actions" drop down at the top right. Select the SAML Metadata option to download the SAML metadata.
Gather Information
Send the Identity Provider metadata from step 18 to Cyderes in order to allow Cyderes to add the OneLogin instance as an IdP.